
This is a detailed Article for installation of Linux
Operating System 5.7_x64 Bit
This installation will help you in installation of “ORACLE DATABASE”, “ORACLE RAC” and “ORACLE EBS Suite”
I have provided the links for complete installations in following Links:
================================================================================================================
Download PuTTY: latest release
putty.exe (the SSH and Telnet client itself)
Download link Putty 64bit Download link for putty 32 bit
================================================================================================================
This article will demonstrate the following Scenarios: Click Here for Linux Basic
1. Creation of Virtual Machine in VMware
2. Installation of Linux Operating System 5.7_x64.
3. Configuring of Static IP, and setting Hostname
4. Installation of VMWARE TOOLS.
5. Sharing folder between Host & Guest Machine
6. Configuration of VNC Server.
7. Configuration of DNS Server
8. Sharing Folder between Linux Machine
9. Basic Linux Stuff
10. Online Reference Books form ORACLE
1)
Creation of Virtual
Machine in VMware 10
(Virtual Memory / Paging file) error in installation of Dev_Suit or Client
just increase virtual memeory size as shown below:
- Compatibility Mode: Windows XP (Service Pack 2)
Control Pannel --> System / My Computer Properties
Advanced system settings
Advanced tab --> Settings(-> Performance Box)
new window Advanced tab --> remove Check mark from automatically
Virtual memory box --> Change 4096 for min/max for (C&D) drive

For SQLPLUS Connection also check in Environment Variables Path for Vairiable "ORACLE_HOME" the value is set correct as per installed oracle_clinet/dev_suite. if variable not available in list then add.
Control Pannel --> System / My Computer Properties
Advanced system settings --> Advanced tab --> Environment Variables...
tnsping PRODDB
sqlplus apps/apps@PRODDB
Registry/Environment Variable:
NLS_LANG: AMERICAN_AMERICA.AR8MSWIN1256
TNS_ADMIN: D:\instantclient_12_1
Control Panel --> Region --> Administrative --> Language for Non-Unicode Program. <- for arabic text in plsql


NOTE For RAC installation: add one more Network
Adapter for Private IP Configuration


NOTE: SETUP RAM limit as per
Your Host Machine Configuration


Creation of Virtual Machine is completed
2)
Installation of Linux
Operating System 5.7_x64
Power on the Virtual Machine

PRESS ENTER to boot

Skip Media Test


For EBS R12.2 installation it is Recommended
SWAP size is Min 16GB
As we gave the complete Hard Disk size
1000GB approx. 1TB. So, we will configure as following
·
/ 30000 - (ROOT
DIRECTORY)
·
/tmp 30000 - (TEMP
FOLDER)
·
Swap 30000 - (SWAP
MEMORY)
·
/u01 Rest - (Remaining)


Basic Packages Required for Oracle 11g Release 2 (11.2) Database & RAC
Installation on Oracle Linux 6.5_x64 for RAC12C
Base System >
Base
Base System >
Client management tools
Base System >
Compatibility libraries
Base System >
Hardware monitoring utilities
Base System >
Large Systems Performance
Base System >
Network file system client
Base System >
Performance Tools
Base System >
Perl Support
Servers >
Server Platform
Servers >
System administration tools
Desktops >
Desktop
Desktops >
Desktop Platform
Desktops >
Fonts
Desktops >
General Purpose Desktop
Desktops >
Graphical Administration Tools
Desktops >
Input Methods
Desktops > X
Window System
Applications >
Internet Browser
Development >
Additional Development
Development >
Development Tools
Once after Installation completes, then install the following RPM Package
Oracle RDBMS Package
rpm -ivh
libaio-devel-0.3.107-10.el6.x86_64.rpm
rpm -ivh
ksh-20120801-10.el6.x86_64.rpm
rpm -ivh
oracle-rdbms-server-11gR2-preinstall-1.0-7.el6.x86_64.rpm
Oracle ASM Package
rpm -ivh
oracleasm-support-2.1.8-1.el6.x86_64.rpm
ORACLE NSCD Service Package
rpm -ivh
nscd-2.12-1.132.el6.x86_64.rpm
Open Filer ISCI Service Package
rpm -ivh
iscsi-initiator-utils-6.2.0.873-10.0.1.el6.x86_64.rpm
DNS Configuration Packages
rpm -ivh
bind-9.8.2-0.17.rc1.0.2.el6_4.6.x86_64.rpm
rpm -ivh
bind-chroot-9.8.2-0.17.rc1.0.2.el6_4.6.x86_64.rpm
Device Checks for ASM Warning error fix
rpm -ivh
oracleasmlib-2.0.4-1.el5.x86_64.rpm
GRID RPM available Grid Software listed in rpm directory
export
CVUQDISK_GRP=oinstall
echo $CVUQDISK
rpm -ivh
cvuqdisk-1.0.9-1.rpm
Linux OS Installation with Reduced Set of Packages for Running Oracle Database Server (Doc ID 728346.1)
Defining a "default RPMs" installation of the Oracle Linux (OL) OS (Doc ID 401167.1)
The Oracle Validated RPM Package for Installation Prerequisites (Doc ID 437743.1)
Certification Information for Oracle Database on Linux x86-64 (Doc ID 1304727.2)
12c, Release 1 (12.1) Grid Infrastructure Installation Guide
================================================================================================================
================================================================================================================
Linux Packages Installation without dependencies:
[root@rac1 R122rpms]#
[root@rac1 R122rpms]# rpm -ivh openmotif21-2.1.30-11.EL5.i386.rpm --nodeps --force
Preparing... ########################################### [100%]
1:openmotif21 ########################################### [100%]
[root@rac1 R122rpms]#
[root@rac1 R122rpms]#
[root@rac1 R122rpms]# rpm -ivh openmotif21-2.1.30-11.EL5.i386.rpm --nodeps --force
Preparing... ########################################### [100%]
1:openmotif21 ########################################### [100%]
[root@rac1 R122rpms]#
================================================================================================================
If looking for Complete Packages Installation then
Press Ctrl+A and Right
Click
“Select all optional
packages” for all Types except languages


Perform a server Healtcheck as per required Installation (DB, RAC, EBS)
Remote Diagnostic Agent (RDA) - Getting Started (Doc ID 314422.1)
[applmgr@rac1 ~]$ cd rda
[applmgr@rac1 rda]$ ./rda.sh -T hcve
To check list of RDBMS homes(only) on servers from root:
[root@rac1 ~]# dbcli list-dbhomes
[root@rac1 ~]#
To determine which distribution and version of Linux is installed, enter the one of the following commands
[root@rac1 ~]# cat /etc/os-release
[root@rac1 ~]# cat /etc/oracle-release
[root@rac1 ~]# cat /etc/redhat-release
[root@rac1 ~]# cat /etc/os-release
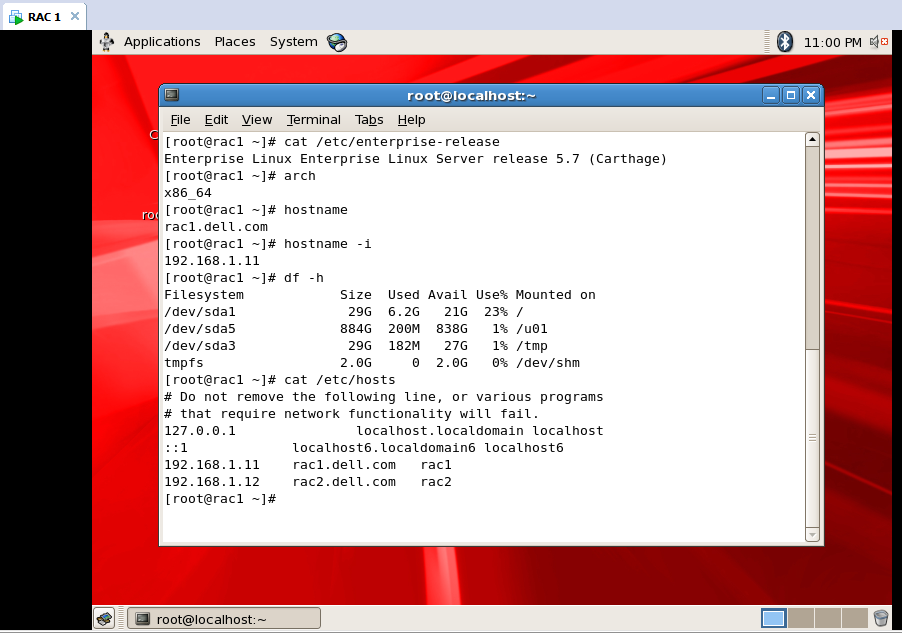
[root@rac1 ~]# cat /etc/enterprise-release
[root@rac1 ~]#
[root@rac1 ~]# hostnamectl (only works on RHEL 7.x)
[root@rac1 ~]# hostnamectl (only works on RHEL 7.x)
[root@rac1 ~]# lsb_release -id
[root@rac1 ~]# lsb_release -a
[root@rac1 ~]# lsb_release -a
LSB Version:
:core-4.0-amd64:core-4.0-ia32:core-4.0-noarch:graphics-4.0-amd64:graphics-4.0-ia32:graphics-4.0-noarch:printing-4.0-amd64:printing-4.0-ia32:printing-4.0-noarch
Distributor ID:
EnterpriseEnterpriseServer
Description: Enterprise Linux Enterprise Linux Server
release 5.7 (Carthage)
Release: 5.7
Codename: Carthage
[root@rac1 ~]#To check Server is physical or virtual:
[root@rac1 ~]# sudo dmidecode -s system-manufacturer
VMware, Inc.
[root@rac1 ~]# virt-what
vmware
[root@rac1 ~]# sudo dmesg | grep "Hypervisor detected"
Hypervisor detected: VMware
To determine whether the required kernel errata is installed, enter the following command:
[root@rac1 ~]# uname -r
[root@rac1 ~]# arch
x86_64
[root@rac1 ~]#
To change kernel in OL 8.9
hostnamectl
sudo ls -l /boot/vmlinuz*
grubby --set-default /boot/vmlinuz-4.18.0-477.10.1.el8_8.x86_64
reboot
To check and update date in RAC Cluster :
[root@rac1 ~]# watch date
[root@rac1 ~]# date -s "07 Oct 2024 10:20:00"
SQL> select to_char(sysdate,'DD-MM-YYYY HH24:MI:SS') from dual;
To determine Current SELinux status:
[root@rac1 ~]# sestatus
SELinux status: disabled
[root@rac1 ~]#
[root@rac1 ~]# grep SELINUX /etc/selinux/config
[root@rac1 ~]# grep SELINUX /etc/sysconfig/selinux
SELINUX=disabled
[root@rac1 ~]# cat /etc/selinux/config
# This file controls the state of SELinux on the system.
# SELINUX= can take one of these three values:
# enforcing - SELinux security policy is enforced.
# permissive - SELinux prints warnings instead of enforcing.
# disabled - No SELinux policy is loaded.
SELINUX=disabled
# SELINUXTYPE= can take one of these two values:
# targeted - Targeted processes are protected,
# mls - Multi Level Security protection.
SELINUXTYPE=targeted
[root@rac1 ~]#
Hostname Setup:
[root@rac1 ~]# cat /etc/hosts
[root@rac1 ~]# hostname -f
rac1.dell.com
[root@rac1 ~]#
[root@rac1 ~]# hostname -i
192.168.1.11
[root@rac1 ~]#
Storage Checks:
[root@rac1 ~]# cat /etc/fstab
[root@rac1 ~]# df -h
Filesystem Size Used Avail Use% Mounted on
/dev/sda1 29G 6.7G
21G 25% /
/dev/sda5 884G 200M
838G 1% /u01
/dev/sda3 29G 182M
27G 1% /tmp
tmpfs 2.0G 0
2.0G 0% /dev/shm
[root@rac1 ~]#
[root@rac1 ~]# grep SwapTotal /proc/meminfo
SwapTotal: 30716272 kB
[root@rac1 ~]#
[oracle@rac1 ~]$ grep Huge /proc/meminfo
AnonHugePages: 0 kB
HugePages_Total: 15322
HugePages_Free: 742
HugePages_Rsvd: 14
HugePages_Surp: 0
Hugepagesize: 2048 kB
[root@rac1 ~]#
Updatecheck limits.conf parameters:
[root@rac1 ~]#
Updatecheck limits.conf parameters:
[root@rac1 ~]# vi /etc/security/limits.conf
Go
grid soft nofile 131072
grid hard nofile 131072
grid soft nproc 131072
grid hard nproc 131072
grid soft core unlimited
grid hard core unlimited
grid soft memlock unlimited
grid hard memlock unlimited
oracle soft nofile 131072
oracle hard nofile 131072
oracle soft nproc 131072
oracle hard nproc 131072
oracle soft core unlimited
oracle hard core unlimited
oracle soft memlock unlimited
oracle hard memlock unlimited
oracle soft stack 10240
oracle hard stack 32768
Check sysctl (updates parameters when run yum preinstall):
[root@rac1 ~]# cat /etc/sysctl.conf
[root@rac1 ~]# sysctl -p
=====================================
Known issues in Linux 7.9 (1-6):
1. Setting up Hostname in Linux 7 (Doc ID 2389622.1)
[root@rac1 ~]# cat /etc/hostname
localhost.localdomain
[root@rac1 ~]# hostnamectl --static
localhost
[root@rac1 ~]# hostnamectl set-hostname rac1
[root@rac1 ~]# hostnamectl --static
rac1
[root@rac1 ~]# cat /etc/hostname
rac1
[root@rac1 ~]#
[root@rac1 ~]# cat /proc/sys/kernel/sem
32000 1024000000 500 32000
[root@rac1 ~]# ipc -ls
------ Semaphore Limits --------
max number of arrays = 32000
max semaphores per array = 32000
max semaphores system wide = 1024000000
max ops per semop call = 500
semaphore max value = 32767
To make the change permanent, add or change the following line in the file /etc/sysctl.conf. This file is used during the boot process.
[root@rac1 ~]#
[root@rac1 ~]# echo "kernel.sem=250 32000 100 128" >> /etc/sysctl.conf
[root@rac1 ~]# echo 250 32000 100 128 > /proc/sys/kernel/sem
[root@rac1 ~]# sysctl -p
[root@rac1 ~]# cat /proc/sys/kernel/sem
250 32000 100 128
[root@rac1 ~]# ipc -ls
------ Semaphore Limits --------
max number of arrays = 128
max semaphores per array = 250
max semaphores system wide = 32000
max ops per semop call = 100
semaphore max value = 32767
[root@rac1 ~]# grep kernel.sem /etc/sysctl.conf
kernel.sem = 250 32000 100 128
3. List out all the services active, running on server in Linux 7
[root@rac1 ~]# systemctl --type=service
[root@rac1 ~]# systemctl --type=service --state=active
[root@rac1 ~]# systemctl --type=service --state=running
[root@rac1 ~]# systemctl list-units
4. Firewall in Oracle Linux 7/6 is enabled by default.
(disbale firewall, if not will face time out error & RC-40201: Unable to connect to Database for client connections)
[root@rac1 ~]#
[root@rac1 ~]# systemctl status firewalld
firewalld.service - firewalld - dynamic firewall daemon
Loaded: loaded (/usr/lib/systemd/system/firewalld.service; enabled)
Active: active (running) since Thu 2014-09-04 19:18:47 EST; 3 months 28 days ago
Main PID: 539 (firewalld)[root@rac1 ~]#
systemctl stop firewalld
systemctl disable firewalld
firewall-cmd --list-all
to add new port in OCI Servers:
sudo firewall-cmd --permanent --add-port=8001/tcp
sudo firewall-cmd --reload
service iptables status <- in Linux 6 firewall setting is iptables
service iptables stop
chkconfig --list iptables
chkconfig iptables off
=====================================
To check list of Groups created in Linux:
[root@rac1 ~]# cat
/etc/group
root:x:0:root
. . . . .
. . . . .
haldaemon:x:68:
avahi-autoipd:x:157:
gdm:x:42:
sabayon:x:86:
oinstall:x:1000:
dba:x:1001:oracle,grid
asmdba:x:1002:oracle,grid
asmadmin:x:1003:oracle,grid
asmoper:x:1004:grid
[root@rac1 ~]#
To check list of Users created in Linux:
[root@rac1 ~]#
[root@rac1 ~]# cat
/etc/passwd
root:x:0:0:root:/root:/bin/bash
. . . . .
. . . . .
sabayon:x:86:86:Sabayon
user:/home/sabayon:/sbin/nologin
oracle:x:1100:1000::/home/oracle:/bin/bash
grid:x:1101:1000::/home/grid:/bin/bash
[root@rac1 ~]#
Create new user and groups for users (ORACLE,GRID)
userdel
oracle
userdel grid
userdel grid
groupdel
oinstall
groupdel dba
groupdel asmdba
groupdel asmadmin
groupdel asmoper
groupdel asmdba
groupdel asmadmin
groupdel asmoper
rm -rf
/var/mail/oracle
rm -rf
/home/oracle/
rm -rf /var/mail/grid
rm -rf /home/grid
groupadd -g
1000 oinstall
groupadd -g
1001 dba
groupadd -g
1002 asmdba
groupadd -g
1003 asmadmin
groupadd -g
1004 asmoper
useradd -u
1100 -g oinstall -G dba,asmdba,asmadmin oracle
useradd -u
1101 -g oinstall -G dba,asmdba,asmadmin,asmoper grid
passwd
oracle
Changing password for
user oracle.
New UNIX password:
BAD PASSWORD: it is
based on a dictionary word
Retype new UNIX
password:
passwd: all
authentication tokens updated successfully.
[root@rac1 ~]#
[root@rac1 ~]# passwd grid
Changing password for
user grid.
New UNIX password:
BAD PASSWORD: it is
too short
Retype new UNIX
password:
passwd: all
authentication tokens updated successfully.
[root@rac1 ~]#
[root@rac1 ~]# su - oracle
[oracle@rac1 ~]$ id
uid=1100(oracle)
gid=1000(oinstall) groups=1000(oinstall),1001(dba),1002(asmdba),1003(asmadmin)
[oracle@rac1 ~]$
[oracle@rac1 ~]$ exit
logout
[root@rac1 ~]# su - grid
[grid@rac1 ~]$ id
uid=1101(grid)
gid=1000(oinstall)
groups=1000(oinstall),1001(dba),1002(asmdba),1003(asmadmin),1004(asmoper) [grid@rac1
~]$
[grid@rac1 ~]$
Your Linux Machine has installed successfully
3)
Configuring of Static
IP, and setting Host name

Enable
_/ Activate device when computer starts (for all
adapters for all Machines)


If you are installing RAC then configure eth1 with Private network IP
(10.0.0.11)


Close the current terminal and open a new terminal
Hosts file entries for RAC Installation
[root@rac1 ~]# cat /etc/hosts
[root@rac1 ~]# cat /etc/hosts
# Do not remove the
following line, or various programs
# that require network
functionality will fail.
127.0.0.1 localhost.localdomain localhost
::1 localhost6.localdomain6 localhost6
##-- Public-IP
192.168.1.11 rac1.dell.com rac1
192.168.1.12 rac2.dell.com rac2
192.168.1.13 rac3.dell.com rac3
##-- Private-IP
10.0.0.11 rac1-priv.dell.com rac1-priv
10.0.0.12 rac2-priv.dell.com rac2-priv
10.0.0.13 rac3-priv.dell.com rac3-priv
##-- Virtual-IP
192.168.1.21 rac1-vip.dell.com rac1-vip
192.168.1.22 rac2-vip.dell.com rac2-vip
192.168.1.23 rac3-vip.dell.com rac3-vip
##-- SCAN IP
192.168.1.30 dellc-scan.dell.com dellc-scan
192.168.1.31 dellc-scan.dell.com dellc-scan
192.168.1.32 dellc-scan.dell.com dellc-scan
##-- Storage-IP
192.168.1.40 san.dell.com san
[root@rac1 ~]#
[root@rac1 ~]# service network restart
Shutting down interface eth0: [ OK ]
Shutting down interface eth1: [ OK ]
Shutting down loopback interface: [ OK ]
Bringing up loopback interface: [ OK ]
Bringing up interface eth0: [ OK ]
Bringing up interface eth1: [ OK ]
[root@rac1 ~]#
[root@rac1 ~]# service network restart
Shutting down interface eth0: [ OK ]
Shutting down interface eth1: [ OK ]
Shutting down loopback interface: [ OK ]
Bringing up loopback interface: [ OK ]
Bringing up interface eth0: [ OK ]
Bringing up interface eth1: [ OK ]
[root@rac1 ~]#
For RAC Installation you need to add PRIVATE IP’s of all nodes and SCAN IP
in your /etc/hosts file
4)
Installation of VMWARE
TOOLS.


login as: root
root@192.168.1.11's
password:
Last login: Tue Mar 21
22:32:59 2017
[root@rac1 ~]# cd
/root/Desktop/vmware-tools-distrib/
[root@rac1
vmware-tools-distrib]# ll
total 480
drwxr-xr-x 2 root root
4096 Mar 21 23:08 bin
drwxr-xr-x 2 root root
4096 Mar 21 23:08 doc
drwxr-xr-x 4 root root
4096 Mar 21 23:08 etc
-rw-r--r-- 1 root root 258515 Oct 18 2013 FILES
-rw-r--r-- 1 root root
2538 Oct 18 2013 INSTALL
drwxr-xr-x 2 root root
4096 Mar 21 23:08 installer
drwxr-xr-x 15 root
root 4096 Mar 21 23:08 lib
-rwxr-xr-x 1 root root 192871 Oct 18 2013 vmware-install.pl
Select default values by (PRESS ENTER) For VMware Tool Installation
[root@rac1
vmware-tools-distrib]# ./vmware-install.pl
A previous
installation of VMware Tools has been detected.
The previous
installation was made by the tar installer (version 4).
Keeping the tar4
installer database format.
You have a version of
VMware Tools installed. Continuing this
install will
first uninstall the
currently installed version. Do you wish
to continue?
(yes/no) [yes]
Uninstalling the tar
installation of VMware Tools.
The removal of VMware
Tools 9.6.1 build-1378637 for Linux completed
successfully.
Installing VMware
Tools.
In which directory do
you want to install the binary files?
[/usr/bin]
What is the directory that
contains the init directories (rc0.d/ to rc6.d/)?
[/etc/rc.d]
What is the directory
that contains the init scripts?
[/etc/rc.d/init.d]
In which directory do
you want to install the daemon files?
[/usr/sbin]
In which directory do
you want to install the library files?
[/usr/lib/vmware-tools]
The path
"/usr/lib/vmware-tools" does not exist currently. This program is
going to create it,
including needed parent directories. Is this what you want?
[yes]
In which directory do
you want to install the documentation files?
[/usr/share/doc/vmware-tools]
The path
"/usr/share/doc/vmware-tools" does not exist currently. This program
is going to create it,
including needed parent directories. Is this what you
want? [yes]
The installation of
VMware Tools 9.6.1 build-1378637 for Linux completed
successfully. You can
decide to remove this software from your system at any
time by invoking the
following command: "/usr/bin/vmware-uninstall-tools.pl".
Before running VMware
Tools for the first time, you need to configure it by
invoking the following
command: "/usr/bin/vmware-config-tools.pl". Do you want
this program to invoke
the command for you now? [yes]
Initializing...
Making sure services
for VMware Tools are stopped.
Stopping Thinprint
services in the virtual machine:
Stopping Virtual Printing daemon: done
Stopping VMware Tools
services in the virtual machine:
Guest operating system daemon: [ OK ]
Unmounting HGFS shares: [
OK ]
Guest filesystem driver: [ OK ]
Found a compatible
pre-built module for vmci. Installing
it...
Found a compatible
pre-built module for vsock. Installing
it...
Found a compatible
pre-built module for vmxnet3. Installing
it...
The module pvscsi has
already been installed on this system by another
installer or package
and will not be modified by this installer.
Use the flag
--clobber-kernel-modules=pvscsi to override.
The module vmmemctl has
already been installed on this system by another
installer or package
and will not be modified by this installer.
Use the flag
--clobber-kernel-modules=vmmemctl to override.
The VMware Host-Guest
Filesystem allows for shared folders between the host OS
and the guest OS in a
Fusion or Workstation virtual environment.
Do you wish
to enable this
feature? [yes]
Found a compatible
pre-built module for vmhgfs. Installing
it...
Found a compatible
pre-built module for vmxnet. Installing
it...
The vmblock enables
dragging or copying files between host and guest in a
Fusion or Workstation
virtual environment. Do you wish to
enable this feature?
[yes]
VMware automatic
kernel modules enables automatic building and installation of
VMware kernel modules
at boot that are not already present. This feature can be
enabled/disabled by
re-running vmware-config-tools.pl.
Would you like to
enable VMware automatic kernel modules?
[no]
Thinprint provides driver-free printing. Do you
wish to enable this feature?
[yes] NO
[yes] NO
Detected X version 7.1
Unable to detect guest
resolution.
Please choose one of
the following display sizes that X will start with:
[1]< 640x480
[2] 800x600
[3] 1024x768
[4] 1280x800
Please enter a number
between 1 and 4:
[1]
X is running fine with
the new config file.
Creating a new initrd
boot image for the kernel.
Starting Virtual Printing daemon: done
Checking acpi hot plug [ OK ]
Starting VMware Tools
services in the virtual machine:
Switching to guest configuration: [ OK ]
Guest vmxnet fast network device: [ OK ]
VM communication interface: [ OK ]
VM communication interface socket
family: [ OK ]
Guest filesystem driver: [ OK ]
Mounting HGFS shares: [FAILED]
Blocking file system: [ OK ]
Guest operating system daemon: [ OK ]
The configuration of
VMware Tools 9.6.1 build-1378637 for Linux for this
running kernel
completed successfully.
You must restart your
X session before any mouse or graphics changes take
effect.
You can now run VMware
Tools by invoking "/usr/bin/vmware-toolbox-cmd" from the
command line.
To enable advanced X
features (e.g., guest resolution fit, drag and drop, and
file and text
copy/paste), you will need to do one (or more) of the following:
1. Manually start
/usr/bin/vmware-user
2. Log out and log
back into your desktop session; and,
3. Restart your X
session.
to use the vmxnet
driver, either reboot or
1. stop networking or
stop any interface using the vmxnet or pcnet32 driver
2. remove the pcnet32
module with 'rmmod pcnet32'
3. remove the vmxnet
module with 'rmmod vmxnet'
4. load the vmxnet
module with 'modprobe -v vmxnet'
5. and restart
networking or restart the stopped network interfaces
Enjoy,
--the VMware team
Found VMware Tools
CDROM mounted at /media/VMware Tools. Ejecting device
/dev/sr0 ...
[root@rac1
vmware-tools-distrib]#
[root@rac1
vmware-tools-distrib]# /usr/bin/vmware-user
[root@rac1
vmware-tools-distrib]#
Restart the system to take effect
[root@rac1
vmware-tools-distrib]# init 6
================================================================================================================
VMware Tools Installation Procedure in Linux 7:
[root@rac1 ~]#
================================================================================================================
VMware Tools Installation Procedure in Linux 7:
[root@rac1 ~]#
[root@rac1 ~]# hostnamectl
Static hostname: rac1.dell.com
Icon name: computer-vm
Chassis: vm
Machine ID: 612d8aa2a54b445a9f7e59a2651c4c33
Boot ID: 0b06249b0d484a34abf16c4d5ccda17b
Virtualization: vmware
Operating System: Oracle Linux Server 7.2
CPE OS Name: cpe:/o:oracle:linux:7:2:server
Kernel: Linux 3.8.13-98.7.1.el7uek.x86_64
Architecture: x86-64
[root@rac1 ~]#
[root@rac1 ~]# rpm -qa open-vm-tools
open-vm-tools-9.10.2-4.0.1.el7.x86_64
[root@rac1 ~]#
[root@rac1 ~]# rpm -e --nodeps open-vm-tools
[root@rac1 ~]#
[root@rac1 ~]# rpm -qa open-vm-tools
[root@rac1 ~]#
[root@rac1 ~]# rm
-rf /etc/vmware-tools/locations
[root@rac1 ~]# cd
/root/Desktop/vmware-tools-distrib
[root@rac1 vmware-tools-distrib]#
[root@rac1 vmware-tools-distrib]# ./vmware-install.pl
[root@rac1 vmware-tools-distrib]# /usr/bin/vmware-user
[root@rac1 vmware-tools-distrib]#
5) Sharing folder between Host & Guest Machine


[root@rac1 ~]# df -h
Filesystem Size Used Avail Use% Mounted on
/dev/sda1 29G
6.5G 21G 25% /
/dev/sda5 884G 200M
838G 1% /u01
/dev/sda3 29G 182M
27G 1% /tmp
tmpfs 2.0G 0
2.0G 0% /dev/shm
.host:/ 701G 182G
519G 26% /mnt/hgfs
[root@rac1 ~]#
[root@rac1 ~]# cd
/mnt/hgfs/
[root@rac1 hgfs]# pwd
/mnt/hgfs
[root@rac1 hgfs]# ls
D
[root@rac1 hgfs]# ll
total 8
drwxrwxrwx 1 root root
8192 Mar 21 16:58 D
[root@rac1 hgfs]#
Form here you can access D-Drive of windows Machine
6)
Configuration of VNC Server.
Check for RPM Package
[root@rac1 ~]# rpm -qa *vnc*
vnc-4.1.2-14.el5_6.6
vnc-server-4.1.2-14.el5_6.6
[root@rac1 ~]#
There are some interesting process in linux like (tmux,screen,vnc,nohup) which create virtual sessions to execute long running jobs inside server in order to avoid ssh session/termial disconnection
login as: root
root@192.168.1.11's password:
Last login: Wed Mar 22 08:01:22 2017 from 192.168.1.1[root@rac1 ~]# rpm -qa *vnc*
vnc-4.1.2-14.el5_6.6
vnc-server-4.1.2-14.el5_6.6
[root@rac1 ~]#
[root@rac1 ~]# yum search tigervnc-server
[root@rac1 ~]# vncserver
[root@rac1 ~]# vncserver
You will require a
password to access your desktops.
Password:
Verify:
xauth: creating new authority file /root/.Xauthority
New 'rac1.dell.com:1
(root)' desktop is rac1.dell.com:1
Creating default
startup script /root/.vnc/xstartup
Starting applications
specified in /root/.vnc/xstartup
Log file is
/root/.vnc/rac1.dell.com:1.log
[root@rac1 ~]#


NOTE: For Normal Desktop make a setting
Uncomment the following two lines for normal Desktop View
[root@rac1 ~]#
#!/bin/sh
# Uncomment the
following two lines for normal desktop:
unset SESSION_MANAGER
exec /etc/X11/xinit/xinitrc
[ -x /etc/vnc/xstartup
] && exec /etc/vnc/xstartup
[ -r $HOME/.Xresources
] && xrdb $HOME/.Xresources
xsetroot -solid grey
vncconfig -iconic
&
xterm -geometry
80x24+10+10 -ls -title "$VNCDESKTOP Desktop" &
twm &
:wq (Save and quit)
[root@rac1 ~]#
[root@rac1 ~]# ps -ef |
grep vnc
root 5695
1 0 08:20 pts/1 00:00:00 Xvnc :1 -desktop rac1.dell.com:1
(root) -httpd /usr/share/vnc/classes -auth /root/.Xauthority -geometry 1024x768
-depth 16 -rfbwait 30000 -rfbauth /root/.vnc/passwd -rfbport 5901 -pn
root 6111
5650 0 08:20 pts/1 00:00:00 grep vnc
[root@rac1 ~]#
[root@rac1 ~]# vncserver man
[root@rac1 ~]# vncserver -list
[root@rac1 ~]# vncserver
-kill :1
Killing Xvnc process
ID 5695
[root@rac1 ~]#
[root@rac1 ~]# vncserver
New 'rac1.dell.com:1
(root)' desktop is rac1.dell.com:1
Starting applications
specified in /root/.vnc/xstartup
Log file is
/root/.vnc/rac1.dell.com:1.log
[root@rac1 ~]#

7) Configuration of DNS Server.
In the following Example “DNS CONFIGURATION” was performed on Oracle
Enterprise Linux Version 6.5_x86_64
In the following Example “DNS” will be configured on RAC-1 Node
[root@rac1 ~]# hostname
rac1.dell.com
[root@rac1 ~]# hostname -i
192.168.1.11
[root@rac1 ~]#
Check whether Packages installed or not:
[root@rac1 ~]# rpm -qa bind
bind-9.3.6-16.P1.el5
[root@rac1 ~]#
[root@rac1 ~]# rpm -qa bind-chroot
bind-chroot-9.3.6-16.P1.el5
[root@rac1 ~]#
[root@rac1 ~]# lsb_release -a
bind-9.3.6-16.P1.el5
[root@rac1 ~]#
[root@rac1 ~]# rpm -qa bind-chroot
bind-chroot-9.3.6-16.P1.el5
[root@rac1 ~]#
[root@rac1 ~]# lsb_release -a
LSB Version:
:base-4.0-amd64:base-4.0-noarch:core-4.0-amd64:core-4.0-noarch:graphics-4.0-amd64:graphics-4.0-noarch:printing-4.0-amd64:printing-4.0-noarch
Distributor ID:
OracleServer
Description: Oracle Linux Server release 6.5
Release: 6.5
Codename: n/a
[root@rac1 ~]#
[root@rac1 ~]# arch
x86_64
[root@rac1 ~]#
[root@rac1 ~]# ifconfig
eth0 Link encap:Ethernet HWaddr 00:0C:29:6F:7E:FB
inet addr:192.168.1.11 Bcast:192.168.1.255 Mask:255.255.255.0
inet6 addr:
fe80::20c:29ff:fe6f:7efb/64 Scope:Link
UP BROADCAST RUNNING MULTICAST MTU:1500
Metric:1
RX packets:2141 errors:0 dropped:0
overruns:0 frame:0
TX packets:2410 errors:0 dropped:0
overruns:0 carrier:0
collisions:0 txqueuelen:1000
RX bytes:199029 (194.3 KiB) TX bytes:297856 (290.8 KiB)
eth1 Link encap:Ethernet HWaddr 00:0C:29:6F:7E:05
inet addr:10.0.0.11 Bcast:10.0.0.255 Mask:255.0.0.0
inet6 addr:
fe80::20c:29ff:fe6f:7e05/64 Scope:Link
UP BROADCAST RUNNING MULTICAST MTU:1500
Metric:1
RX packets:30 errors:0 dropped:0
overruns:0 frame:0
TX packets:12 errors:0 dropped:0
overruns:0 carrier:0
collisions:0 txqueuelen:1000
RX bytes:1992 (1.9 KiB) TX bytes:816 (816.0 b)
Interrupt:16 Base address:0x2000
lo Link encap:Local Loopback
inet addr:127.0.0.1 Mask:255.0.0.0
inet6 addr: ::1/128 Scope:Host
UP LOOPBACK RUNNING MTU:65536
Metric:1
RX packets:111 errors:0 dropped:0
overruns:0 frame:0
TX packets:111 errors:0 dropped:0
overruns:0 carrier:0
collisions:0 txqueuelen:0
RX bytes:9164 (8.9 KiB) TX bytes:9164 (8.9 KiB)
[root@rac1 ~]#
Add DNS Entry to file eth0 (OPTIONAL)
[root@rac1 ~]# cat
/etc/sysconfig/network-scripts/ifcfg-eth0
DEVICE=eth0
TYPE=Ethernet
UUID=3d4f32be-e55b-4315-be4f-737aef113322
ONBOOT=yes
NM_CONTROLLED=yes
BOOTPROTO=none
IPADDR=192.168.1.11
NETMASK=255.255.255.0
GATEWAY=192.168.1.1
IPV6INIT=no
USERCTL=no
HWADDR=00:0C:29:6F:7E:FB
PREFIX=24
DEFROUTE=yes
IPV4_FAILURE_FATAL=yes
NAME="System
eth0"
DNS=192.168.1.11
[root@rac1 ~]#
[root@rac1 ~]# cat
/etc/sysconfig/network
NETWORKING=yes
HOSTNAME=rac1.dell.com
[root@rac1 ~]#
[root@rac1 ~]# cat
/etc/resolv.conf
# Generated by
NetworkManager
search dell.com
nameserver
192.168.1.11
options attempts:2
options timeout:1
# No nameservers
found; try putting DNS servers into your
# ifcfg files in
/etc/sysconfig/network-scripts like so:
#
# DNS1=xxx.xxx.xxx.xxx
# DNS2=xxx.xxx.xxx.xxx
# DOMAIN=lab.foo.com
bar.foo.com
[root@rac1 ~]#
Create "named.conf" file in specified location
[root@rac1 ~]#
[root@rac1 ~]# vi
/var/named/chroot/etc/named.conf
[root@rac1 ~]# cat
/var/named/chroot/etc/named.conf
options {
directory "/var/named";
};
zone
"dell.com" {
type master;
file "for.zone";
};
zone
"1.168.192.in-addr.arpa" {
type master;
file "rev.zone";
};
Create FORWARD & REVERSE files at Specified Locations
Forward File:
[root@rac1 ~]#
[root@rac1 ~]# vi
/var/named/chroot/var/named/for.zone
[root@rac1 ~]# cat
/var/named/chroot/var/named/for.zone
@ IN SOA
rac1.dell.com. root.dell.com (
2010110101
36400
86000
108000
36000 )
@ IN NS rac1.dell.com.
rac1 IN A 192.168.1.11
rac1-vip IN A
192.168.1.21
rac2 IN A 192.168.1.12
rac2-vip IN A 192.168.1.22
rac3 IN A 192.168.1.13
rac3-vip IN A 192.168.1.23
dellc-scan IN A
192.168.1.30
dellc-scan IN A
192.168.1.31
dellc-scan IN A
192.168.1.32
Reverse File:
[root@rac1 ~]# vi
/var/named/chroot/var/named/rev.zone
[root@rac1 ~]# cat /var/named/chroot/var/named/rev.zone
@ IN SOA rac1.dell.com. root.dell.com (
2010110101;
36400;
86000;
108000;
36000 );
@ IN NS rac1.dell.com.
11 IN PTR
rac1.dell.com.
21 IN PTR
rac1-vip.dell.com.
12 IN PTR
rac2.dell.com.
22 IN PTR
rac2-vip.dell.com.
13 IN PTR rac3.dell.com.
23 IN PTR rac3-vip.dell.com.
30 IN PTR
dellc-scan.dell.com.
31 IN PTR
dellc-scan.dell.com.
32 IN PTR
dellc-scan.dell.com.
Changing Group name for Created files
[root@rac1 ~]#
[root@rac1 ~]# chgrp named
/var/named/chroot/etc/named.conf
[root@rac1 ~]#
[root@rac1 ~]# ll
/var/named/chroot/etc/named.conf
-rw-r--r-- 1 root named 202 Sep 18 19:20
/var/named/chroot/etc/named.conf
[root@rac1 ~]#
[root@rac1 ~]#
[root@rac1 ~]# cd
/var/named/chroot/var/named/
[root@rac1 named]#
[root@rac1 named]# chgrp named
for.zone rev.zone
[root@rac1 named]# ll
total 8
-rw-r--r-- 1 root
named 288 Sep 18 19:21 for.zone
-rw-r--r-- 1 root
named 308 Sep 18 19:21 rev.zone
[root@rac1 named]#
Now Start NAMED Service on
[root@rac1 ~]# service
named status
rndc: neither
/etc/rndc.conf nor /etc/rndc.key was found
named is stopped
[root@rac1 ~]# service
named restart
Generating
/etc/rndc.key:
[ OK ]
Starting named: [
OK ]
[root@rac1 ~]#
[root@rac1 ~]# service
named status
version: 9.8.2rc1-RedHat-9.8.2-0.17.rc1.0.2.el6_4.6
CPUs found: 1
worker threads: 1
number of zones: 18
debug level: 0
xfers running: 0
xfers deferred: 0
soa queries in
progress: 0
query logging is OFF
recursive clients:
0/0/1000
tcp clients: 0/100
server is up and running
named (pid 1901) is running...
[root@rac1 ~]#
Set the following parameter to keep named services on after reboot
[root@rac1 ~]#
[root@rac1 ~]# chkconfig
named on
[root@rac1 ~]#
Note: SCAN-Listener Load Balancing in "Round Robin Fashion" @RAC-1
[root@rac1 ~]#
[root@rac1 ~]# nslookup
dellc-scan
Server: 192.168.1.11
Address: 192.168.1.11#53
Name: dellc-scan.dell.com
Address: 192.168.1.32
Name: dellc-scan.dell.com
Address: 192.168.1.30
Name: dellc-scan.dell.com
Address: 192.168.1.31
[root@rac1 ~]#
[root@rac1 ~]#
[root@rac1 ~]# nslookup
dellc-scan
Server: 192.168.1.11
Address: 192.168.1.11#53
Name: dellc-scan.dell.com
Address: 192.168.1.30
Name: dellc-scan.dell.com
Address: 192.168.1.31
Name: dellc-scan.dell.com
Address: 192.168.1.32
[root@rac1 ~]#
[root@rac1 ~]#
[root@rac1 ~]# nslookup
dellc-scan
Server: 192.168.1.11
Address: 192.168.1.11#53
Name: dellc-scan.dell.com
Address: 192.168.1.31
Name: dellc-scan.dell.com
Address: 192.168.1.32
Name: dellc-scan.dell.com
Address: 192.168.1.30
[root@rac1 ~]#
[root@rac1 ~]#
[root@rac1 ~]# nslookup
dellc-scan
Server: 192.168.1.11
Address: 192.168.1.11#53
Name: dellc-scan.dell.com
Address: 192.168.1.32
Name: dellc-scan.dell.com
Address: 192.168.1.30
Name: dellc-scan.dell.com
Address: 192.168.1.31
[root@rac1 ~]#
Configuration of DNS on RAC2 Node
[root@rac2 ~]#
[root@rac2 ~]# hostname
rac2.dell.com
[root@rac2 ~]# hostname -i
192.168.1.12
[root@rac2 ~]#
[root@rac2 ~]# lsb_release
-a
LSB Version:
:base-4.0-amd64:base-4.0-noarch:core-4.0-amd64:core-4.0-noarch:graphics-4.0-amd64:graphics-4.0-noarch:printing-4.0-amd64:printing-4.0-noarch
Distributor ID:
OracleServer
Description: Oracle Linux Server release 6.5
Release: 6.5
Codename: n/a
[root@rac2 ~]#
[root@rac2 ~]# arch
x86_64
[root@rac2 ~]#
[root@rac2 ~]# ifconfig
eth0 Link
encap:Ethernet HWaddr 00:0C:29:36:9C:20
inet addr:192.168.1.12 Bcast:192.168.1.255 Mask:255.255.255.0
inet6 addr: fe80::20c:29ff:fe36:9c20/64
Scope:Link
UP BROADCAST RUNNING MULTICAST MTU:1500
Metric:1
RX packets:293 errors:0 dropped:0
overruns:0 frame:0
TX packets:255 errors:0 dropped:0
overruns:0 carrier:0
collisions:0 txqueuelen:1000
RX bytes:27986 (27.3 KiB) TX bytes:34366 (33.5 KiB)
Interrupt:16 Base address:0x2000
eth1 Link
encap:Ethernet HWaddr 00:0C:29:36:9C:16
inet addr:10.0.0.12 Bcast:10.255.255.255 Mask:255.0.0.0
inet6 addr: fe80::20c:29ff:fe36:9c16/64
Scope:Link
UP BROADCAST RUNNING MULTICAST MTU:1500
Metric:1
RX packets:20 errors:0 dropped:0
overruns:0 frame:0
TX packets:12 errors:0 dropped:0
overruns:0 carrier:0
collisions:0 txqueuelen:1000
RX bytes:1296 (1.2 KiB) TX bytes:888 (888.0 b)
lo Link encap:Local Loopback
inet addr:127.0.0.1 Mask:255.0.0.0
inet6 addr: ::1/128 Scope:Host
UP LOOPBACK RUNNING MTU:65536
Metric:1
RX packets:28 errors:0 dropped:0
overruns:0 frame:0
TX packets:28 errors:0 dropped:0
overruns:0 carrier:0
collisions:0 txqueuelen:0
RX bytes:2356 (2.3 KiB) TX bytes:2356 (2.3 KiB)
[root@rac2 ~]#
[root@rac2 ~]# nslookup
dellc-scan
;; connection timed
out; trying next origin
;; connection timed
out; no servers could be reached
Modify your resolve.conf at rest of the NODES
[root@rac2 ~]#
[root@rac2 ~]# service
named status
rndc: neither
/etc/rndc.conf nor /etc/rndc.key was found
named is stopped
[root@rac2 ~]#
[root@rac2 ~]# vi
/etc/resolv.conf
[root@rac2 ~]# cat
/etc/resolv.conf
# Generated by
NetworkManager
options attempts:2
options timeout:1
search dell.com
nameserver
192.168.1.11
# No nameservers
found; try putting DNS servers into your
# ifcfg files in
/etc/sysconfig/network-scripts like so:
#
# DNS1=xxx.xxx.xxx.xxx
# DNS2=xxx.xxx.xxx.xxx
# DOMAIN=lab.foo.com
bar.foo.com
[root@rac2 ~]#
Note: Round Robin Fashion @RAC-2 (FOR SCAN-Listener Load Balancing)
[root@rac2 ~]#
[root@rac2 ~]# nslookup
dellc-scan
Server: 192.168.1.11
Address: 192.168.1.11#53
Name: dellc-scan.dell.com
Address: 192.168.1.32
Name: dellc-scan.dell.com
Address: 192.168.1.30
Name: dellc-scan.dell.com
Address: 192.168.1.31
[root@rac2 ~]#
[root@rac2 ~]#
[root@rac2 ~]# nslookup
dellc-scan
Server: 192.168.1.11
Address: 192.168.1.11#53
Name: dellc-scan.dell.com
Address: 192.168.1.30
Name: dellc-scan.dell.com
Address: 192.168.1.31
Name: dellc-scan.dell.com
Address: 192.168.1.32
[root@rac2 ~]#
[root@rac2 ~]#
[root@rac2 ~]# nslookup
dellc-scan
Server: 192.168.1.11
Address: 192.168.1.11#53
Name: dellc-scan.dell.com
Address: 192.168.1.31
Name: dellc-scan.dell.com
Address: 192.168.1.32
Name: dellc-scan.dell.com
Address: 192.168.1.30
[root@rac2 ~]#
[root@rac2 ~]#
[root@rac2 ~]# nslookup
dellc-scan
Server: 192.168.1.11
Address: 192.168.1.11#53
Name: dellc-scan.dell.com
Address: 192.168.1.32
Name: dellc-scan.dell.com
Address: 192.168.1.30
Name: dellc-scan.dell.com
Address: 192.168.1.31
[root@rac2 ~]#
8) NFS File Sharing between Linux Machines on same Network
In the following Example A folder in RAC-1 name & location /u02 is being shared by other Machine which are on same Network
The Sharing of Folder is done by NFS Share (Network File System)
RAC1
|
RAC2
|
[root@rac1 ~]# hostname -i
192.168.1.11
[root@rac1 ~]# vi
/etc/exports
/u02 192.168.1.12
Save and Exit (:wq)
[root@rac1 ~]# exportfs -r [root@rac1 ~]# exportfs [root@rac1 ~]# [root@rac1 ~]# service
nfs start
Starting NFS services: [ OK
]
Starting NFS quotas: [ OK
]
Starting NFS daemon: [ OK
]
Starting NFS mountd: [ OK
]
[root@rac1 ~]#
|
[root@rac2 ~]# hostname -i
192.168.1.12
[root@rac2 ~]#
[root@rac2 ~]# mkdir /u02
[root@rac2 ~]# systemctl status nfs [root@rac2 ~]# service nfs start
[root@rac2 ~]# vi /etc/fstab 192.168.1.11:/u02 /u02 nfs rw,sync,hard,intr 0 0
[root@rac2 ~]# mount -a [root@rac2 ~]# systemctl daemon-reload [root@rac2 ~]# df -h [root@rac2 ~]# mount -t nfs 192.168.1.11:/u02 /u02
[root@rac2 ~]# cd /u02
[root@rac2 u02]# ll
|
8.1) DELL EMC Lun re-attach to server and detect automatic after reboot:
[root@rac2 ~]# lsblk
[root@rac2 ~]# lsscsi |egrep -i dgc
[1:0:0:0] disk DGC VRAID 5001 /dev/sdb
[root@rac2 ~]# ls -l /dev/disk/by-path
lrwxrwxrwx. 1 root root 9 Jul 13 20:28 pci-0000:07:00.0-fc-0x5006016249e0157a-lun-0 -> ../../sdb
lrwxrwxrwx. 1 root root 10 Jul 13 20:28 pci-0000:07:00.0-fc-0x5006016249e0157a-lun-0-part1 -> ../../sdb1
[root@rac2 ~]# fdisk -l
[root@rac2 ~]# grep data /etc/mtab
[root@rac2 ~]# mount /dev/sdb1 /data
[root@rac2 ~]#
[root@rac2 ~]# grep data /etc/mtab >>/etc/fstab
[root@rac2 ~]# cat /etc/fstab
### EMC Storge 2 TB Lun (mount /dev/sdb1 /data)
/dev/sdb1 /data ext4 rw,seclabel,relatime,stripe=1024 0 0
[root@rac2 ~]# df -h
/dev/sdb1 2.0T 1.4T 493G 75% /data
[root@rac2 ~]# blkid
[root@rac2 ~]# blkid|grep asm
[root@rac2 ~]# ll /dev/disk/by-uuid
[root@rac2 ~]# cat /etc/fstab
### EMC Storge 2 TB Lun (mount /dev/sdb1 /data)
#/dev/sdb1 /data ext4 rw,seclabel,relatime,stripe=1024 0 0
UUID=2e009fdc-4d2c-445f-ad45-50380cdbb330 /data auto nosuid,nodev,nofail 0 0
[root@rac2 ~]# df -h
/dev/sdb1 2.0T 1.4T 493G 75% /data
9) Basic Linux Stuff
Linux Basics:
Environment File Setup.
Environment File Setup.
[oracle@rac1 ~]$
[oracle@rac1 ~]$ vi
/home/oracle/dell.env
iexport ORACLE_BASE=/u01/app/oracle
#export
ORACLE_HOME=/u01/app/oracle/product/11.2.0/dbhome_1
export ORACLE_HOME=/u01/app/oracle/product/12.1.0/dbhome_1
export PATH=$ORACLE_HOME/bin:$ORACLE_HOME/OPatch:$PATH
export
TNS_ADMIN=$ORACLE_HOME/network/admin
LD_LIBRARY_PATH=$ORACLE_HOME/lib:/lib/usr/lib;
export LD_LIBRARY_PATH
#export OMS_HOME=/u01/app/oracle/middleware/
#export AGENT_HOME=/u01/app/oracle/agent/agent_inst/
export ORACLE_SID=DELL
export ORACLE_UNQNAME=DELL
[oracle@rac1 ~]$ env | grep ORA
ORACLE_SID=DELL
ORACLE_BASE=/u01/app/oracle
ORACLE_HOME=/u01/app/oracle/product/11.2.0/dbhome_1
================================================================================================================
[root@rac1 ~]#
Crontab Service for schedule backup: (restart for any troubleshoot)
list all cronjobs running on server (root/all_users)
[root@rac1 ~]# tail -n 1000 /var/spool/cron/*
[root@rac1 ~]# service crond status
Redirecting to /bin/systemctl status crond.service
● crond.service - Command Scheduler
Loaded: loaded (/usr/lib/systemd/system/crond.service; enabled; vendor preset: enabled)
Active: active (running) since Mon 2021-05-31 14:37:05 +03; 24min ago
Main PID: 1696 (crond)
Tasks: 1
Memory: 2.7M
CGroup: /system.slice/crond.service
└─1696 /usr/sbin/crond -n
May 31 14:37:05 prodapp1 systemd[1]: Started Command Scheduler.
May 31 14:37:05 prodapp1 crond[1696]: (CRON) INFO (RANDOM_DELAY will be scaled with factor 42% if used.)
May 31 14:37:05 prodapp1 crond[1696]: (CRON) INFO (running with inotify support)
May 31 14:37:05 prodapp1 crond[1696]: (CRON) INFO (@reboot jobs will be run at computer's startup.)
May 31 14:39:01 prodapp1 crond[1696]: (root) RELOAD (/var/spool/cron/root)
May 31 14:41:01 prodapp1 crond[1696]: (root) RELOAD (/var/spool/cron/root)
May 31 14:45:01 prodapp1 crond[1696]: (root) RELOAD (/var/spool/cron/root)
[root@rac1 ~]#
[root@rac1 ~]#
[root@rac1 ~]#
[root@rac1 ~]# crontab -l ( List all cron jobs of current users)
1 0 * * * /home/applmgr/bkupscripts/apptarbkp > /home/applmgr/bkupscripts/Logs/apptarbkp.log 2>&1
#*/2 * * * * /bin/date >> /tmp/cron_output
[root@rac1 ~]#
[root@rac1 ~]# crontab -e ( edit cron jobs of current users)
[root@rac1 ~]#
[root@rac1 ~]# cat /home/applmgr/bkupscripts/apptarbkp
tar -C /u01/OCI -cvzf /u02/DailyBKP/"$(date '+%Y-%m-%d')-fs1.tar.gz" fs1
tar -C /u01/OCI -cvzf /u02/DailyBKP/"$(date '+%Y-%m-%d')-fs2.tar.gz" fs2
tar -C /u01/OCI -cvzf /u02/DailyBKP/"$(date '+%Y-%m-%d')-fs_ne.tar.gz" fs_ne
find /u02/DailyBKP -type f -name "*.gz" -mtime +7 -exec rm {} \;
--------------
tar -C /home/oracle/expdp/ -cvzf /home/oracle/expdp/AJAR_LIVE_27092021.dmp.tar.gz AJAR_LIVE_27092021.dmp (to tar in different loc. & Exclude path /home/oracle/expdp/ while uncompress)
tar -cvzf /root/dcs_`hostname`.tar.zip /opt/oracle/dcs/log
================================================================================================================
RAM Cache Swap Clearing schedule in crontab daily at 3 AM:
[root@rac1 ~]# free -m -wh
RAM Cache Swap Clearing schedule in crontab daily at 3 AM:
[root@rac1 ~]# free -m -wh
[root@rac1 ~]#
[root@rac1 ~]#
[root@rac1 ~]# echo 1 > /proc/sys/vm/drop_caches && swapoff -a && swapon -a && printf '\n%s\n' ' Ram-cache and the swap get cleared'
[root@rac1 ~]# free -h -w
To schedule in cronjobs at 3 am daily:
[root@rac1 ~]# cat clear_cache.sh
#!/bin/bash
# Note, we are using "echo 3", but it is not recommended in production instead use "echo 1"
echo " Current Memory Usage" > /root/clear_cache.log
free -h -w >> /root/clear_cache.log
echo 1 > /proc/sys/vm/drop_caches && swapoff -a && swapon -a && printf '\n%s\n' ' Ram-cache and swap get cleared with option-1 Log file: /root/clear_cache.log '
echo "$(date)"
echo " After Clearing Memory with option-1 " >> /root/clear_cache.log
free -h -w >> /root/clear_cache.log
echo "RAM / Cache / SWAP Memory cleared with option-1 at: $(date) Log file for output is at /root/clear_cache.log" >> /root/clear_cache.log
[root@ahcdevcloudapp ~]#
[root@rac1 ~]# chmod 755 /root/clear_cache.sh
[root@rac1 ~]# crontab -l
0 3 * * * /root/clear_cache.sh >> /root/clear_cache.log
[root@rac1 ~]# /root/clear_cache.sh
================================================================================================================
To Unzip multiple zip file to desired location:
[root@rac1 ~]#
[root@rac1 OEM_12_1_0_3]# ll
total 5936641
-rwxrwxrwx 1 root root 1783676290 Mar 7 13:42 em12103p1_linux64_disk1.zip
-rwxrwxrwx 1 root root 1689422062 Mar 7 13:59 em12103p1_linux64_disk2.zip
-rwxrwxrwx 1 root root 2606016969 Mar 7 14:48 em12103p1_linux64_disk3.zip
-rwxrwxrwx 1 root root 4334 Apr 29 07:51 installation links.txt
[root@rac2 OEM_12_1_0_3]#
[root@rac1 OEM_12_1_0_3]#
[root@rac1 OEM_12_1_0_3]# unzip '*.zip' -d /u01/sftwr/OEM_12103/
. . . .
. . . .
. . . .
3 archives were successfully processed.
. . . .
. . . .
3 archives were successfully processed.
To Unzip file to a diffrent location 2 methods commands
[root@rac2 OEM_12_1_0_3]# unzip -q download_location/file.zip --> files unzip to current folder from zip file which is at different location[root@rac2 OEM_12_1_0_3]# unzip /u01/file.zip -d /u02/destination_folder --> files unzip directly to defined destination_folder
To zip file
[root@rac2 OEM_12_1_0_3]# zip FNDCPGSC2041519.zip FNDCPGSC2041519.txt
adding: FNDCPGSC2041519.txt (deflated 93%)
[root@rac2 OEM_12_1_0_3]# ls -ltrh
-rw-r--r--. 1 applmgr oinstall 154M Mar 8 09:37 FNDCPGSC2041519.txt
-rw-r--r--. 1 applmgr oinstall 12M Mar 8 09:39 FNDCPGSC2041519.zip
Increase /dev/shm (TEMP FILE SYSTEM)
Error- PRVE-0426: the
size of in-memory files= system mounted /dev/shm is '998' which is less than
required size of 2014mb on node""
Fix this by follwoing
command
[root@rac1 ~]# df -h
Filesystem Size
Used Avail Use% Mounted on
tmpfs 998M 76K
998M 1% /dev/shm
[root@rac1 ~]# vi /etc/mtab
[root@rac1 ~]# vi /etc/fstab
LABEL=/ / ext3 defaults 1 1
LABEL=/u01 /u01 ext3 defaults 1 2
LABEL=/tmp /tmp ext3 defaults 1 2
tmpfs /dev/shm tmpfs defaults 0 0
devpts /dev/pts devpts gid=5,mode=620 0 0
sysfs /sys sysfs defaults 0 0
proc /proc proc defaults 0 0
LABEL=SWAP-sda2 swap swap defaults 0 0
[root@rac1 ~]#
Temporary Solution:
Note: it will restore default values if Server reboots
[root@rac1 ~]#
[root@rac1 ~]# mount -t
tmpfs shmfs -o size=3G /dev/shm
[root@rac1 ~]#
[root@rac1 ~]# df -h
Filesystem Size
Used Avail Use% Mounted on
tmpfs 3.0G
0 3.0G 0% /dev/shm
[root@rac1 ~]#
Permanent Solution:
Note: it Store the record for all time unless changed to defaults
[root@rac1 ~]#
[root@rac1 ~]# vi
/etc/fstab
LABEL=/ / ext3 defaults 1 1
LABEL=/u01 /u01 ext3 defaults 1 2
LABEL=/tmp /tmp ext3 defaults 1 2
tmpfs /dev/shm tmpfs size=3g 0
0
devpts /dev/pts devpts gid=5,mode=620 0 0
sysfs /sys sysfs defaults 0 0
proc /proc proc defaults 0 0
LABEL=SWAP-sda2 swap swap defaults 0 0
[root@rac1 ~]#
================================================================================================================
Display Parameter Setup.
Display Parameter Setup.
[oracle@rac1 ~]$
[oracle@rac1 ~]$ echo $DISPLAY
[oracle@rac1 ~]$ echo $DISPLAY
[oracle@rac1 ~]$ export DISPLAY=:0.0
[oracle@rac1 ~]$ echo $DISPLAY
:0.0
[oracle@rac1 ~]$ xclock
[oracle@rac1 ~]$ DISPLAY="`who -m | cut -f2 -d'(' | cut -f1 -d')'`:0.0"
export DISPLAY
[oracle@rac1 ~]$ export DISPLAY="`who -m | cut -f2 -d'(' | cut -f1 -d')'`:0.0"
--------------------------------------
./RUNINSTALLER results in: Could not execute auto check for display colors using command /usr/bin/xdpyinfo (Doc ID 888699.1)
[root@rac1 ~]# yum -y install xterm* xorg* xauth xclock
grep AdressFamily /etc/ssh/sshd_config
grep X11Forwarding /etc/ssh/sshd_config
vi /etc/ssh/sshd_config (AdressFamily any -> AdressFamily inet)
systemctl restart sshd================================================================================================================
Chkconfig Command - for list all services: in Linux 6
[root@rac1 ~]#
[root@rac1 ~]# chkconfig --list
Chkconfig Command - for Particular services:
[root@rac1 ~]#
[root@rac1 ~]# chkconfig --list | grep iscsi
iscsi 0:off 1:off 2:on 3:on 4:on 5:on 6:off
Chkconfig Command - for list all services: in Linux 6
[root@rac1 ~]#
[root@rac1 ~]# chkconfig --list
Chkconfig Command - for Particular services:
[root@rac1 ~]#
[root@rac1 ~]# chkconfig --list | grep iscsi
iscsi 0:off 1:off 2:on 3:on 4:on 5:on 6:off
iscsid 0:off 1:off 2:off 3:on 4:on 5:on 6:off
[root@rac1 ~]#
================================================================================================================
Run level
[root@rac1 ~]#
[root@rac1 ~]# cat /etc/inittab
#
# inittab This file describes how the INIT process should set up
# the system in a certain run-level.
#
# Author: Miquel van Smoorenburg, <miquels@drinkel.nl.mugnet.org>
# Modified for RHS Linux by Marc Ewing and Donnie Barnes
#
# Default runlevel. The runlevels used by RHS are:
# 0 - halt (Do NOT set initdefault to this)
# 1 - Single user mode
# 2 - Multiuser, without NFS (The same as 3, if you do not have networking)
# 3 - Full multiuser mode
# 4 - unused
# 5 - X11
# 6 - reboot (Do NOT set initdefault to this)
#
id:5:initdefault:
# System initialization.
si::sysinit:/etc/rc.d/rc.sysinit
l0:0:wait:/etc/rc.d/rc 0
l1:1:wait:/etc/rc.d/rc 1
l2:2:wait:/etc/rc.d/rc 2
l3:3:wait:/etc/rc.d/rc 3
l4:4:wait:/etc/rc.d/rc 4
l5:5:wait:/etc/rc.d/rc 5
l6:6:wait:/etc/rc.d/rc 6
# Trap CTRL-ALT-DELETE
ca::ctrlaltdel:/sbin/shutdown -t3 -r now
# When our UPS tells us power has failed, assume we have a few minutes
# of power left. Schedule a shutdown for 2 minutes from now.
# This does, of course, assume you have powerd installed and your
# UPS connected and working correctly.
pf::powerfail:/sbin/shutdown -f -h +2 "Power Failure; System Shutting Down"
# If power was restored before the shutdown kicked in, cancel it.
pr:12345:powerokwait:/sbin/shutdown -c "Power Restored; Shutdown Cancelled"
# Run gettys in standard runlevels
1:2345:respawn:/sbin/mingetty tty1
2:2345:respawn:/sbin/mingetty tty2
3:2345:respawn:/sbin/mingetty tty3
4:2345:respawn:/sbin/mingetty tty4
5:2345:respawn:/sbin/mingetty tty5
6:2345:respawn:/sbin/mingetty tty6
# Run xdm in runlevel 5
x:5:respawn:/etc/X11/prefdm -nodaemon
h1:35:respawn:/etc/init.d/init.ohasd run >/dev/null 2>&1 </dev/null
[root@rac1 ~]#
[root@rac1 ~]# who -r
run-level 5 2018-01-30 07:57 last=S
[root@rac1 ~]#
================================================================================================================
[root@rac1 ~]#
================================================================================================================
Run level
[root@rac1 ~]#
[root@rac1 ~]# cat /etc/inittab
#
# inittab This file describes how the INIT process should set up
# the system in a certain run-level.
#
# Author: Miquel van Smoorenburg, <miquels@drinkel.nl.mugnet.org>
# Modified for RHS Linux by Marc Ewing and Donnie Barnes
#
# Default runlevel. The runlevels used by RHS are:
# 0 - halt (Do NOT set initdefault to this)
# 1 - Single user mode
# 2 - Multiuser, without NFS (The same as 3, if you do not have networking)
# 3 - Full multiuser mode
# 4 - unused
# 5 - X11
# 6 - reboot (Do NOT set initdefault to this)
#
id:5:initdefault:
# System initialization.
si::sysinit:/etc/rc.d/rc.sysinit
l0:0:wait:/etc/rc.d/rc 0
l1:1:wait:/etc/rc.d/rc 1
l2:2:wait:/etc/rc.d/rc 2
l3:3:wait:/etc/rc.d/rc 3
l4:4:wait:/etc/rc.d/rc 4
l5:5:wait:/etc/rc.d/rc 5
l6:6:wait:/etc/rc.d/rc 6
# Trap CTRL-ALT-DELETE
ca::ctrlaltdel:/sbin/shutdown -t3 -r now
# When our UPS tells us power has failed, assume we have a few minutes
# of power left. Schedule a shutdown for 2 minutes from now.
# This does, of course, assume you have powerd installed and your
# UPS connected and working correctly.
pf::powerfail:/sbin/shutdown -f -h +2 "Power Failure; System Shutting Down"
# If power was restored before the shutdown kicked in, cancel it.
pr:12345:powerokwait:/sbin/shutdown -c "Power Restored; Shutdown Cancelled"
# Run gettys in standard runlevels
1:2345:respawn:/sbin/mingetty tty1
2:2345:respawn:/sbin/mingetty tty2
3:2345:respawn:/sbin/mingetty tty3
4:2345:respawn:/sbin/mingetty tty4
5:2345:respawn:/sbin/mingetty tty5
6:2345:respawn:/sbin/mingetty tty6
# Run xdm in runlevel 5
x:5:respawn:/etc/X11/prefdm -nodaemon
h1:35:respawn:/etc/init.d/init.ohasd run >/dev/null 2>&1 </dev/null
[root@rac1 ~]#
[root@rac1 ~]# who -r
run-level 5 2018-01-30 07:57 last=S
[root@rac1 ~]#
================================================================================================================
Shortcut Key connection for .bash_profile
[oratest@RUH-ERPAT01 ~]$
[oratest@RUH-ERPAT01 ~]$ cat .bash_profile
# .bash_profile
# Get the aliases and functions
if [ -f ~/.bashrc ]; then
. ~/.bashrc
fi
# User specific environment and startup programs
PATH=$PATH:$HOME/bin
export PATH
#+++---- Shortcut Keys ---+++#
alias s='sqlplus / as sysdba'
alias sa='sqlplus apps/apps'
alias crs='crsctl check crs'
alias crst='crs_stat -t'
alias srvd='srvctl status database -d DELL'
alias srvl='srvctl status listener'
alias sa='sqlplus apps/apps'
alias crs='crsctl check crs'
alias crst='crs_stat -t'
alias srvd='srvctl status database -d DELL'
alias srvl='srvctl status listener'
[oratest@RUH-ERPAT01 ~]$
[oratest@RUH-ERPAT01 ~]$ . .bash_profile
Now connect to sqlplus just by typing "s"
[oratest@RUH-ERPAT01 ~]$
[oratest@RUH-ERPAT01 ~]$ s
SQL*Plus: Release 11.1.0.7.0 - Production on Thu Oct 26 10:09:52 2017
Copyright (c) 1982, 2008, Oracle. All rights reserved.
Connected to:
Oracle Database 11g Enterprise Edition Release 11.1.0.7.0 - 64bit Production
With the Partitioning, OLAP, Data Mining and Real Application Testing options
SQL>
List of Active Listners running on server
[root@rac1 ~]#
[root@rac1 ~]# ps -ef | grep tns
root 71 2 0 2017 ? 00:00:00 [netns]
oratest 58610 1 0 Jan03 ? 00:00:07 /u01/PTEST/db/tech_st/11.1.0/bin/tnslsnr PTEST -inherit
oratest 59583 59548 0 10:34 pts/2 00:00:00 grep tns
oraclone 63918 1 0 2017 ? 00:04:55 /u01/PCLONE/db/tech_st/11.1.0/bin/tnslsnr PCLONE -inherit
oratest 69046 1 0 Jan03 ? 00:00:00 /u01/PTEST/apps/tech_st/10.1.2/bin/tnslsnr APPS_PTEST -inherit
oraclone 75686 1 0 2017 ? 00:00:00 /u01/PCLONE/apps/tech_st/10.1.2/bin/tnslsnr APPS_PCLONE -inherit
[root@rac1 ~]#
================================================================================================================
List of Active Databases running on server
[root@rac1 ~]#
[root@rac1 ~]# ps -ef | grep pmon
root 59602 55070 0 10:38 pts/2 00:00:00 grep pmon
oratest 59968 1 0 Jan03 ? 00:03:26 ora_pmon_PTEST
oraclone 64845 1 0 2017 ? 00:21:36 ora_pmon_PCLONE
[root@rac1 ~]#
================================================================================================================
List of Background Process running for Database(DELL)
[oracle@rac1 ~]$
[oracle@rac1 ~]$ ps -ef | grep -i DELL|wc -l
36
[oracle@rac1 ~]$ ps -ef | grep -i DELL
oracle 8192 1 0 10:44 ? 00:00:00 ora_w000_DELL
oracle 8263 8226 0 10:46 pts/3 00:00:00 grep -i dell
oracle 10158 1 0 09:14 ? 00:00:00 ora_pmon_DELL
oracle 10162 1 0 09:14 ? 00:00:00 ora_psp0_DELL
oracle 10166 1 0 09:14 ? 00:00:26 ora_vktm_DELL
oracle 10172 1 0 09:14 ? 00:00:00 ora_gen0_DELL
oracle 10176 1 0 09:14 ? 00:00:00 ora_diag_DELL
oracle 10180 1 0 09:14 ? 00:00:00 ora_dbrm_DELL
oracle 10184 1 0 09:14 ? 00:00:02 ora_dia0_DELL
oracle 10188 1 0 09:14 ? 00:00:00 ora_mman_DELL
oracle 10192 1 0 09:14 ? 00:00:00 ora_dbw0_DELL
oracle 10196 1 0 09:14 ? 00:00:00 ora_lgwr_DELL
oracle 10200 1 0 09:14 ? 00:00:01 ora_ckpt_DELL
oracle 10204 1 0 09:14 ? 00:00:00 ora_smon_DELL
oracle 10208 1 0 09:14 ? 00:00:00 ora_reco_DELL
oracle 10212 1 0 09:14 ? 00:00:00 ora_mmon_DELL
oracle 10216 1 0 09:14 ? 00:00:03 ora_mmnl_DELL
oracle 10220 1 0 09:14 ? 00:00:00 ora_d000_DELL
oracle 10224 1 0 09:14 ? 00:00:00 ora_s000_DELL
oracle 10244 1 0 09:14 ? 00:00:00 ora_qmnc_DELL
oracle 10269 1 0 09:14 ? 00:00:00 ora_cjq0_DELL
oracle 10277 1 0 09:14 ? 00:00:00 ora_q000_DELL
oracle 10281 1 0 09:14 ? 00:00:00 ora_q001_DELL
oracle 10441 1 0 09:24 ? 00:00:00 ora_smco_DELL
[oracle@rac1 ~]$
================================================================================================================
List of active Process running under current OS user i.e oracle
[oracle@rac1 ~]$
[oracle@rac1 ~]$
[oracle@rac1 ~]$ ps -fux
[oracle@rac1 ~]$ ps fux
grep command to search a error word from same file name from multiple folders
[oracle@rac1 ~]$ ls -ltrh $INST_TOP/admin/log/*/adconfig.log
[oracle@rac1 ~]$ grep -r Interrupted $INST_TOP/admin/log/*/adconfig.log
================================================================================================================
Oracle ASM Configuration
Creation of ASM Disk
Here in this example I am using SAN Storage for ASM using Openfiler
[root@rac1 ~]#
[root@rac1 ~]# ping san
PING san.dell.com (192.168.1.40) 56(84) bytes of data.
64 bytes from san.dell.com (192.168.1.40): icmp_seq=1 ttl=64 time=85.5 ms
64 bytes from san.dell.com (192.168.1.40): icmp_seq=2 ttl=64 time=0.437 ms
^C
--- san.dell.com ping statistics ---
2 packets transmitted, 2 received, 0% packet loss, time 1077ms
rtt min/avg/max/mdev = 0.437/43.014/85.592/42.578 ms
[root@rac1 ~]#
[root@rac1 ~]# fdisk -l
Disk /dev/sda: 1073.7 GB, 1073741824000 bytes
255 heads, 63 sectors/track, 130541 cylinders
Units = cylinders of 16065 * 512 = 8225280 bytes
Device Boot Start End Blocks Id System
/dev/sda1 * 1 25496 204796588+ 83 Linux
/dev/sda2 25497 29320 30716280 82 Linux swap / Solaris
/dev/sda3 29321 33144 30716280 83 Linux
/dev/sda4 33145 130541 782341402+ 5 Extended
/dev/sda5 33145 130541 782341371 83 Linux
[root@rac1 ~]#
[root@rac1 ~]# iscsiadm -m discovery -t st -p 192.168.1.40
[root@rac1 ~]# iscsiadm -m discovery -t st -p 192.168.1.40
192.168.1.40:3260,1 iqn.2006-01.com.openfiler:tsn.5cbf23534a21
[root@rac1 ~]#
[root@rac1 ~]# service iscsi restart
iscsiadm: No matching sessions found
Stopping iSCSI daemon:
iscsid is stopped [ OK ]
Starting iSCSI daemon: FATAL: Error inserting ib_iser (/lib/modules/2.6.32-200.13.1.el5uek/kernel/drivers/infiniband/ulp/iser/ib_iser.ko): Unknown symbol in module, or unknown parameter (see dmesg)
[ OK ]
[ OK ]
Setting up iSCSI targets: Logging in to [iface: default, target: iqn.2006-01.com.openfiler:tsn.5cbf23534a21, portal: 192.168.1.40,3260]
Login to [iface: default, target: iqn.2006-01.com.openfiler:tsn.5cbf23534a21, portal: 192.168.1.40,3260] successful.
[ OK ]
[root@rac1 ~]#
[root@rac1 ~]# fdisk -l
Disk /dev/sda: 1073.7 GB, 1073741824000 bytes
255 heads, 63 sectors/track, 130541 cylinders
Units = cylinders of 16065 * 512 = 8225280 bytes
Device Boot Start End Blocks Id System
/dev/sda1 * 1 25496 204796588+ 83 Linux
/dev/sda2 25497 29320 30716280 82 Linux swap / Solaris
/dev/sda3 29321 33144 30716280 83 Linux
/dev/sda4 33145 130541 782341402+ 5 Extended
/dev/sda5 33145 130541 782341371 83 Linux
Disk /dev/sdb: 102.3 GB, 102374572032 bytes
255 heads, 63 sectors/track, 12446 cylinders
Units = cylinders of 16065 * 512 = 8225280 bytes
Disk /dev/sdb doesn't contain a valid partition table
[root@rac1 ~]#
Format ASM Disk
[root@rac1 ~]#
[root@rac1 ~]# fdisk /dev/sdb
Device contains neither a valid DOS partition table, nor Sun, SGI or OSF disklabel
Building a new DOS disklabel. Changes will remain in memory only,
until you decide to write them. After that, of course, the previous
content won't be recoverable.
The number of cylinders for this disk is set to 12446.
There is nothing wrong with that, but this is larger than 1024,
and could in certain setups cause problems with:
1) software that runs at boot time (e.g., old versions of LILO)
2) booting and partitioning software from other OSs
(e.g., DOS FDISK, OS/2 FDISK)
Warning: invalid flag 0x0000 of partition table 4 will be corrected by w(rite)
Command (m for help): n
Command action
e extended
p primary partition (1-4)
p
Partition number (1-4): 1
First cylinder (1-12446, default 1):
Using default value 1
Last cylinder or +size or +sizeM or +sizeK (1-12446, default 12446):
Using default value 12446
Command (m for help): w
The partition table has been altered!
Calling ioctl() to re-read partition table.
WARNING: Re-reading the partition table failed with error 16: Device or resource busy.
The kernel still uses the old table.
The new table will be used at the next reboot.
Syncing disks.
[root@rac1 ~]#
[root@rac1 ~]# fdisk -l
Disk /dev/sda: 1073.7 GB, 1073741824000 bytes
255 heads, 63 sectors/track, 130541 cylinders
Units = cylinders of 16065 * 512 = 8225280 bytes
Device Boot Start End Blocks Id System
/dev/sda1 * 1 25496 204796588+ 83 Linux
/dev/sda2 25497 29320 30716280 82 Linux swap / Solaris
/dev/sda3 29321 33144 30716280 83 Linux
/dev/sda4 33145 130541 782341402+ 5 Extended
/dev/sda5 33145 130541 782341371 83 Linux
Disk /dev/sdb: 102.3 GB, 102374572032 bytes
255 heads, 63 sectors/track, 12446 cylinders
Units = cylinders of 16065 * 512 = 8225280 bytes
Device Boot Start End Blocks Id System
/dev/sdb1 1 12446 99972463+ 83 Linux
Configure ORACLEASM Parameters.
[root@rac1 ~]#
[root@rac1 ~]# oracleasm status
Checking if ASM is loaded: no
Checking if /dev/oracleasm is mounted: no
[root@rac1 ~]#
[root@rac1 ~]# oracleasm configure -i
Configuring the Oracle ASM library driver.
This will configure the on-boot properties of the Oracle ASM library
driver. The following questions will determine whether the driver is
loaded on boot and what permissions it will have. The current values
will be shown in brackets ('[]'). Hitting <ENTER> without typing an
answer will keep that current value. Ctrl-C will abort.
Default user to own the driver interface []: grid
Default group to own the driver interface []: asmadmin
Start Oracle ASM library driver on boot (y/n) [n]: y
Scan for Oracle ASM disks on boot (y/n) [y]: y
Writing Oracle ASM library driver configuration: done
[root@rac1 ~]#
[root@rac1 ~]# oracleasm status
Checking if ASM is loaded: no
Checking if /dev/oracleasm is mounted: no
[root@rac1 ~]#
[root@rac1 ~]# oracleasm init
[root@rac1 ~]# oracleasm init
Creating /dev/oracleasm mount point: /dev/oracleasm
Loading module "oracleasm": oracleasm
Mounting ASMlib driver filesystem: /dev/oracleasm
[root@rac1 ~]#
[root@rac1 ~]# oracleasm status
[root@rac1 ~]# oracleasm status
Checking if ASM is loaded: yes
Checking if /dev/oracleasm is mounted: yes
[root@rac1 ~]#
[root@rac1 ~]# oracleasm createdisk DELLASM /dev/sdb1
[root@rac1 ~]# oracleasm createdisk DELLASM /dev/sdb1
Writing disk header: done
Instantiating disk: done
[root@rac1 ~]#
[root@rac1 ~]# oracleasm scandisks
[root@rac1 ~]# oracleasm scandisks
Reloading disk partitions: done
Cleaning any stale ASM disks...
Scanning system for ASM disks...
[root@rac1 ~]#
[root@rac1 ~]# oracleasm listdisks
[root@rac1 ~]# oracleasm listdisks
DELLASM
[root@rac1 ~]#
[root@rac1 ~]# cd /dev/oracleasm/disks/
[root@rac1 disks]# ll
total 0
brw-rw---- 1 grid asmadmin 8, 17 Dec 16 11:56 DELLASM
[root@rac1 disks]#
[root@rac1 ~]# partx -a
/dev/sdb
BLKPG: Device or
resource busy
error adding partition
1
BLKPG: Device or
resource busy
error adding partition
5
BLKPG: Device or
resource busy
[root@rac1 ~]#
[root@rac1 ~]# partprobe
/dev/sdb1
[root@rac1 ~]#
================================================================================================================
2017/09/19 16:11:04 CLSRSC-1003: Failed to start resource OC4J
Solution: Remove "#" from host file on first Line as show below
================================================================================================================
To Delete RPM Package:
[root@rac1 ~]# rpm -qa cvuqdisk
cvuqdisk-1.0.9-1.x86_64
[root@rac1 ~]# rpm -e cvuqdisk
[root@rac1 ~]#
================================================================================================================
2017/09/19 16:11:04 CLSRSC-1003: Failed to start resource OC4J
Solution: Remove "#" from host file on first Line as show below
[root@rac1 ~]# cat /etc/hosts
# Do not remove the following line, or various programs
# that require network functionality will fail.
127.0.0.1 localhost.localdomain localhost
::1 localhost6.localdomain6 localhost6================================================================================================================
Watch Command for FND Process
[oratest@RUH-ERPAT01 ~]$
[oratest@RUH-ERPAT01 ~]$ watch -n 1 'ps -fu oratest|grep -i fnd|wc -l'
================================================================================================================To Delete RPM Package:
[root@rac1 ~]# rpm -qa cvuqdisk
cvuqdisk-1.0.9-1.x86_64
[root@rac1 ~]# rpm -e cvuqdisk
[root@rac1 ~]#
[root@rac1 ~]# rpm -qa cvuqdisk
[root@rac1 ~]#
[root@rac1 ~]#
Forcefully installing a package without dependencies:
[root@rac1 ~]#
[root@rac1 ~]# rpm -ivh oracleasmlib-2.0.4-1.el5.x86_64.rpm --force --nodeps
[root@rac1 ~]# rpm -ivh oracleasmlib-2.0.4-1.el5.x86_64.rpm --force --nodeps
Forcefully Delete a package without dependencies:
[root@rac1 ~]#
[root@rac1 ~]# rpm -qa open-vm-tools
open-vm-tools-9.10.2-4.0.1.el7.x86_64
[root@rac1 ~]# rpm -e open-vm-tools
error: Failed dependencies:
libhgfs.so.0()(64bit)
is needed by (installed) open-vm-tools-desktop-9.10.2-4.0.1.el7.x86_64
libvmtools.so.0()(64bit)
is needed by (installed) open-vm-tools-desktop-9.10.2-4.0.1.el7.x86_64
open-vm-tools(x86-64)
= 9.10.2-4.0.1.el7 is needed by (installed)
open-vm-tools-desktop-9.10.2-4.0.1.el7.x86_64
[root@rac1 vmware-tools-distrib]# cd
[root@rac1 ~]#
[root@rac1 ~]# rpm -e --nodeps open-vm-tools
[root@rac1 ~]#
[root@rac1 ~]# rpm -qa open-vm-tools
[root@rac1 ~]#
================================================================================================================
ORACLE Packages Installation using Yum (yum Commands):
[root@rac1 ~]# cd /etc/yum.repos.d
[root@rac1 yum.repos.d]# ls
public-yum-ol7.repo
[root@rac1 yum.repos.d]# mv public-yum-ol7.repo bkp_public-yum-ol7.repo
[root@rac1 yum.repos.d]#
[root@rac1 yum.repos.d]# ls
bkp_public-yum-ol7.repo public-yum-ol7.repo
[root@rac1 yum.repos.d]# wget http://public-yum.oracle.com/public-yum-ol7.repo
[root@rac1 yum.repos.d]#
Using a text editor, modify the file, changing the field enabled=0 to enabled=1 to reflect repositories that correspond to the machine's operating system release.
[root@rac1 yum.repos.d]#
[root@rac1 yum.repos.d]# vi public-yum-ol7.repo
[ol6_latest]
name=Oracle Linux $releasever Latest ($basearch)
baseurl=http://public-yum.oracle.com/repo/OracleLinux/OL6/latest/$basearch/
gpgkey=http://public-yum.oracle.com/RPM-GPG-KEY-oracle-ol7
gpgcheck=1
enabled=1
[ol6_addons]
name=Oracle Linux $releasever Add ons ($basearch)
baseurl=http://public-yum.oracle.com/repo/OracleLinux/OL6/addons/$basearch/
gpgkey=http://public-yum.oracle.com/RPM-GPG-KEY-oracle-ol7
gpgcheck=1
enabled=1
[ol6_UEK_latest]
name=Latest Unbreakable Enterprise Kernel for Oracle Linux $releasever ($basearch)
baseurl=http://public-yum.oracle.com/repo/OracleLinux/OL6/UEK/latest/$basearch/
gpgkey=http://public-yum.oracle.com/RPM-GPG-KEY-oracle-ol7
gpgcheck=1
enabled=1
[root@rac1 yum.repos.d]#
Other usefull command of yum
[root@rac1 yum.repos.d]# yum repolist
[root@rac1 yum.repos.d]# yum search oracle-rdbms oracle-database oracle-ebs (for EBS-R12, 11g,12c,18c,19c,21c)
[root@rac1 yum.repos.d]# yum search oracle-rdbms (for 11gr2,12cr1 only)
[root@rac1 yum.repos.d]# yum search oracle-database (for 12cr2,18c,19c later)
[root@rac1 yum.repos.d]# yum search oracle-ebs (EBS R-12 for Oracle Linux 6/7 )
[root@rac1 yum.repos.d]# yum -y install xterm* xorg* xauth xclock
For Oracle Database 18C issue the following command for Oracle Linux
[root@rac1 yum.repos.d]#
[root@rac1 yum.repos.d]# yum -y install oracle-database-preinstall-18c
[root@rac1 yum.repos.d]#
For Oracle Database 12CR2, 12CR1 issue the following command for Oracle Linux 6 & 7
[root@rac1 yum.repos.d
[root@rac1 yum.repos.d]# yum -y install oracle-database-server-12cR2-preinstall
[root@rac1 yum.repos.d]#
[root@rac1 yum.repos.d]# yum -y install oracle-rdbms-server-12cR1-preinstall
[root@rac1 yum.repos.d]#
For Oracle Database 11gR2 issue the following command for Oracle Linux 6 & 7
[root@rac1 yum.repos.d
[root@rac1 yum.repos.d]# yum -y install oracle-rdbms-server-11gR2-preinstall
[root@rac1 yum.repos.d]#
For Oracle Database 11gR2 issue the following command for Oracle Linux 5
[root@rac1 yum.repos.d]#
[root@rac1 yum.repos.d]# yum -y install oracle-validated
[root@rac1 yum.repos.d]#
For EBS R12 issue the following command
Oracle E-Business Suite Installation and Upgrade Notes Release 12 (12.2) for Linux x86-64 (Doc ID 1330701.1)
[root@rac1 yum.repos.d]# yum install oracle-ebs-server-R12-preinstall
[root@rac1 yum.repos.d]#
Update all packages and then install the pre-install rpm by running the following yum commands:
[root@rac1 yum.repos.d]#
[root@rac1 yum.repos.d]# yum update
. . . . .
. . . . .
. . . . .
. . . . .
Transaction Summary
================================================================================
Install
33 Packages (+182 Dependent packages)
Upgrade
1218 Packages
Total download size: 1.3 G
Is this ok [y/d/N]: y
Downloading packages:
No Presto metadata available for ol7_UEKR3
No Presto metadata available for ol7_UEKR5
No Presto metadata available for ol7_latest
warning:
/var/cache/yum/x86_64/7Server/ol7_latest/packages/389-ds-base-libs-1.3.8.4-18.el7_6.x86_64.rpm:
Header V3 RSA/SHA256 Signature, key ID ec551f03: NOKEY
Public key for
389-ds-base-libs-1.3.8.4-18.el7_6.x86_64.rpm is not installed
(1/1433):
389-ds-base-libs-1.3.8.4-18.el7_6.x86_64.rpm
| 698 kB 00:01
(2/1433): 389-ds-base-1.3.8.4-18.el7_6.x86_64.rpm | 1.7 MB 00:02
(3/1433):
LibRaw-0.14.8-5.el7.20120830git98d925.x86_64.rpm | 249 kB 00:00
(4/1433): GeoIP-1.5.0-13.el7.x86_64.rpm | 1.5 MB 00:01
(5/1433): ModemManager-glib-1.6.10-1.el7.x86_64.rpm | 231 kB 00:00
. . . . .
. . . . .
. . . . .
. . . . .
(1430/1433): zip-3.0-11.el7.x86_64.rpm | 259 kB 00:00
(1431/1433): zlib-1.2.7-18.el7.i686.rpm | 90 kB
00:00
(1432/1433):
zlib-1.2.7-18.el7.x86_64.rpm
| 89 kB 00:00
(1433/1433):
zenity-3.28.1-1.el7.x86_64.rpm
| 4.0 MB 00:03
--------------------------------------------------------------------------------
Total
1.4 MB/s | 1.3 GB 14:57
Retrieving key from
file:///etc/pki/rpm-gpg/RPM-GPG-KEY-oracle
Importing GPG key 0xEC551F03:
Userid
: "Oracle OSS group (Open Source Software group)
<build@oss.oracle.com>"
Fingerprint: 4214 4123 fecf c55b 9086 313d
72f9 7b74 ec55 1f03
Package
: 7:oraclelinux-release-7.2-1.0.5.el7.x86_64 (@anaconda/7.2)
From
: /etc/pki/rpm-gpg/RPM-GPG-KEY-oracle
Is this ok [y/N]: y
Running transaction check
Running transaction test
Transaction test succeeded
Running transaction
Updating :
libgcc-4.8.5-36.0.1.el7.x86_64
1/2688
Updating :
1:redhat-release-server-7.6-4.0.1.el7.x86_64 2/2688
Installing : ipa-common-4.6.4-10.0.1.el7.noarch 3/2688
Installing : 1:grub2-common-2.02-0.76.0.3.el7.noarch 4/2688
Updating :
xkeyboard-config-2.24-1.el7.noarch 5/2688
. . . . .
. . . . .
. . . . .
. . . . .
pygobject3.x86_64 0:3.14.0-3.el7
pygobject3-base.x86_64 0:3.14.0-3.el7
python-caribou.noarch 0:0.4.16-1.el7
python-cryptography.x86_64 0:0.8.2-1.el7
python-pyasn1.noarch 0:0.1.6-2.el7
rdma.noarch 0:7.2_4.1_rc6-1.el7
usbmuxd.x86_64 0:1.0.8-11.el7
Complete!
[root@rac1 yum.repos.d]#
Solaris rpm package install:
# pkg install oracle-database-preinstall-19c
SETTING SEMAPHORE PARAMETERS click here
To determine the values of the four described semaphore parameters, run:
[root@rac1 ~]# cat /proc/sys/kernel/sem
[root@rac1 ~]# ipcs -ls
[root@rac1 ~]# echo 250 32000 100 128 > /proc/sys/kernel/sem (Temporary Solution)
[root@rac1 ~]# echo "kernel.sem=250 32000 100 128" >> /etc/sysctl.conf (Permanent Solution)
[root@rac1 ~]#
================================================================================================================
Oracle Database Basic Stuff
================================================================================================================
List of Background Process Running for DATABASE "DELL"
================================================================================================================
-->Registry-->HKEY_LOCAL_MACHINE-->SOFTWARE-->WOW6432Node-->Oracle-->KEY_DevSuiteHome1
Oracle RAC Basic Stuff
================================================================================================================
Profile setup for RAC 12C for password less connectivity
[root@rac1 ~]#
[root@rac1 ~]# cat
/etc/profile
#--Profile options
setting for RAC Installation
#--add the following
parameter to bottom of file /etc/profile
if [ $USER =
"oracle" ] || [ $USER = "grid" ]; then
umask 022
if [ $SHELL = "/bin/ksh" ];
then
ulimit -p 16384
ulimit -n 65536
else
ulimit -u 16384 -n 65536
fi
fi
[root@rac1 ~]#
[root@rac1 ~]#
================================================================================================================
To check list of background process running in Cluster
[root@rac1 ~]#
[root@rac1 ~]# ps -ef | grep d.bin
[root@rac1 ~]#
================================================================================================================
To check list of background process running in Cluster
[root@rac1 ~]#
[root@rac1 ~]# ps -ef | grep d.bin
10) Oracle 12c Release 2(12.2) Online Books
Oracle Books
The following link provide all necessary information about Installation of ORACLE 12c Release-2(12.2)
The following link provide all necessary information about Installation of ORACLE 12c Release-2(12.2)
- DATABASE Pre-requisite
- GRID INFRASTRUCTURE Pre-requisite
- LINUX Pre-requisite
Further follow the ORACLE Installation Guides for your DB, RAC, and EBS installation
Thanks for Reading
Regards,
Mohammed Areefuddin.
Suggested Topics :
Linux | DATABASE | RMAN | RAC | EBS |
| R1229 M7 Clone | ||||
| RAC DataGuard | Pluggable DB Clone | |||
| appsutil for DB | ||||
| JDK JRE upgrade | ||||
| Add EBS Node | ||||
No comments:
Post a Comment